Putting LiDAR on a drone is a bit like giving a high-tech mapping tool a bird's-eye view. It marries two powerful pieces of tech to build incredibly detailed 3D maps of the world below.
Think of it like a bat using echolocation, but instead of sound waves, the system fires out millions of laser pulses. These pulses measure distances and map the terrain with stunning precision, creating a rich dataset called a point cloud. This digital foundation is the starting point for everything from engineering designs to environmental analysis.
How Drone LiDAR Technology Works
At its core, the concept is straightforward, but it relies on a sophisticated partnership between three key components. It all kicks off with a laser scanner sending out thousands of rapid light pulses towards the ground every single second.
The system then clocks the exact time it takes for each pulse to hit an object—whether it's a tree branch, a power line, or the ground itself—and bounce back to the sensor. By calculating this "time of flight," the system works out the precise distance to that object.
When you mount this entire setup on a moving drone, it can paint an intricate picture of the landscape using millions of these individual measurement points. This massive collection of points, each with its own X, Y, and Z coordinate, is what we call a point cloud—a detailed, three-dimensional digital twin of the area you've surveyed.
The Three Pillars of a Drone LiDAR System
Of course, to get that kind of accuracy, the laser scanner can't do it alone. It needs a team of technologies working in perfect harmony to turn those light pulses into a reliable 3D map. Think of it as a crew where each member has a specific, vital job to do.
Below is a simple breakdown of the essential hardware that works together to capture precise 3D data from the air.
| Component | What It Does | Simple Analogy |
|---|---|---|
| Laser Scanner | Emits laser pulses and records their return time to measure distances. | A super-fast tape measure that uses light instead of tape. |
| GNSS Receiver | Determines the drone's precise location (latitude, longitude, altitude) on Earth. | Your car's GPS, but far more accurate and updated thousands of times a second. |
| IMU | Measures the drone's orientation (roll, pitch, yaw) to account for tilts and turns. | The balance system in your inner ear that tells you if you're leaning or level. |
Working together, these components ensure every single point captured by the laser is correctly georeferenced. The GNSS tells the system where the drone is, the IMU clarifies how it's oriented in the air, and the laser measures the distance to objects on the ground. This seamless integration is what elevates a simple laser measurement into survey-grade data.
The uptake of this technology is booming, especially here in Australia. Valued at around USD 0.28 billion, the Australian drones market is expanding quickly and is projected to hit USD 2.76 billion by 2034, growing at a compound annual rate of 27%. This surge shows a clear and growing demand for LiDAR on a drone in key sectors like mining, construction, and environmental monitoring. For a deeper dive, you can explore the full report on Australia's drone industry to see these market trends in detail.
Choosing Your Drone LiDAR System
Picking the right drone and sensor combination is the first, and arguably most important, step in any successful mapping project. This decision dictates what you can achieve, how efficiently you can work, and the quality of your final data. It’s like choosing any specialised tool for a job – you need the right fit. You wouldn't bring a sledgehammer to a finishing job, and the same principle applies here; the LiDAR sensor and the drone have to be a perfect match for your project's goals.
Making the right call means looking past the price tag and really digging into the technical specs that matter. It's a balancing act between the sensor's capabilities and the drone's real-world performance, making sure they operate as one seamless unit. Let’s break down what you need to look for, starting with the LiDAR sensor itself and then moving on to the drone platform.
Evaluating Key LiDAR Sensor Specifications
The sensor is the heart of your operation. Its specifications have a direct and massive impact on the detail and accuracy of your point cloud. Getting your head around these metrics is crucial for ensuring you capture the data you actually need, particularly when you're working in tricky environments like dense bushland or complex urban areas.
Two of the most critical specs to get right are:
-
Points Per Second (PPS): This number tells you how many laser pulses the sensor fires off every second, and it can range from hundreds of thousands to over a million. A higher PPS generally creates a denser point cloud, which means you capture much finer details. This is incredibly valuable when you're mapping things like intricate power lines or detailed infrastructure.
-
Number of Returns: A single laser pulse can bounce back multiple times as it travels to the ground. Think of a pulse hitting the top of a gum tree (that’s the first return), then a branch halfway down (the second return), and finally hitting the soil underneath (the last return).
A sensor that can capture multiple returns is a total game-changer for working with vegetation. It’s what lets you see through a dense canopy to accurately map the ground below – something that’s next to impossible with single-return systems or photogrammetry alone.
This is precisely what makes a lidar on a drone so powerful for forestry, environmental monitoring, and any topographic survey that involves vegetated landscapes.
Matching the Drone to the Mission
Once you’ve got a handle on the kind of sensor you need, it's time to find a drone that can carry it properly. The drone is far more than just a way to get the sensor in the air; it's the platform that defines your flight time, how much ground you can cover, and how stable your data collection will be. Not all drones are built the same, and the heavier, high-performance LiDAR sensors demand a seriously robust aircraft.
Here’s what to look for in a drone:
-
Payload Capacity: This is simply how much weight the drone can carry, not including its own. It needs to comfortably handle your LiDAR sensor, its navigation system (IMU/GNSS), and any other gear like cameras or extra batteries. Pushing a drone right to its payload limit is a bad idea – it kills stability and dramatically cuts down your flight time.
-
Flight Time: More flight time means more ground covered in a single trip, which boosts your efficiency and means less time on the ground swapping batteries. For professional survey work, a drone that can stay in the air for 30-45 minutes with a LiDAR payload on board is a great benchmark. That’s enough time to capture a serious amount of data.
-
Stability and Redundancy: When you’ve got expensive LiDAR equipment in the air, rock-solid stability is non-negotiable. Look for drones with built-in redundancy, like Quadcopters or octocopters, which can keep flying even if a motor fails. Excellent wind resistance is also vital for sticking to your flight plan and getting clean, consistent data, especially when flying in challenging Australian weather.
Your Step-by-Step LiDAR Mapping Workflow
Taking a real-world site and turning it into a precise digital model with a LiDAR drone isn't just a matter of flying and pressing a button. It's a structured, repeatable process that, when done right, delivers incredible results. I like to break this workflow down into three core phases: the careful planning you do in the office, the efficient data capture out in the field, and the detailed processing back at your computer.
Think of it like building a custom piece of furniture. You start with a detailed blueprint (mission planning), carefully cut and prepare your materials (data capture), and finally, assemble and finish the product (data processing). If you rush or skip a step, the final quality just won't be there.
Phase 1: Mission Planning and Preparation
Before the drone’s propellers even start spinning, the most important work happens at your desk. This is where you lay the foundation for a successful flight, using specialised software to design an automated flight plan. The goal here is simple: ensure you cover the entire target area with enough data overlap to create a flawless point cloud.
During this phase, you'll need to lock in a few key details:
- Define the Survey Area: First things first, you need to clearly outline your project's boundaries on a map within your planning software.
- Set Flight Parameters: This is where you decide on the best flight altitude, speed, and the spacing between your flight lines. Flying lower gets you denser data, but it takes more time. It's always a trade-off between the level of detail you need and how efficiently you can get the job done.
- Ensure Sufficient Overlap: A classic rookie mistake is not having enough overlap. You should plan for a sidelap (the overlap between adjacent flight lines) of at least 30%. This is non-negotiable if you want to avoid gaps in your data and maintain consistent point density across the site.
This flowchart gives a good overview of how to think about choosing the right system for your specific project.
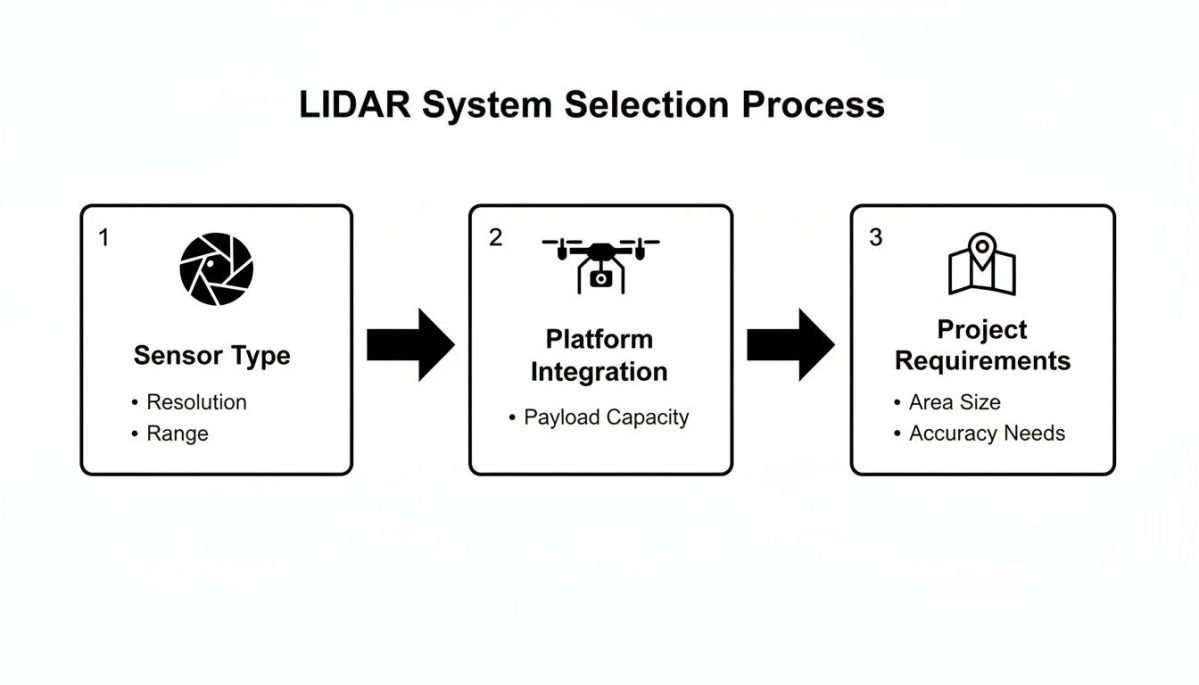
As you can see, your project requirements are what really drive your choice of sensor and drone, showing how all these decisions are connected.
Phase 2: Field Data Capture
With a solid flight plan locked and loaded, it’s time to head out to the site. This stage is all about execution. You need to follow best practices to capture clean, high-quality raw data. A smooth operation in the field means you’re far less likely to face costly re-flights or spend hours correcting data back in the office.
Every field workflow should start with a pre-flight checklist. Seriously, don't skip this. Check your battery levels, sensor connections, and any airspace authorisations. Once you're airborne, the drone will fly the pre-programmed route on its own. While it’s automated, your job is to keep a close eye on the system, watch for any environmental changes like a sudden shift in the weather, and make sure the whole operation stays safe.
A critical but often overlooked step is the IMU initialisation. Before takeoff, the drone must remain perfectly still for a few minutes. This allows the Inertial Measurement Unit to align itself. This calibration is absolutely essential for getting accurate orientation data, which is the bedrock of your final point cloud's accuracy.
Phase 3: Data Processing and Final Deliverables
After a successful day in the field, you’ll head back to the office with a memory card packed with raw laser, GNSS, and IMU data. This is where the magic really happens. Using powerful software, you'll transform these separate streams of information into a single, cohesive 3D point cloud.
The post-processing journey typically follows these steps:
- Trajectory Generation: The first move is to combine the drone's GNSS and IMU data to create a super-precise flight path, or "trajectory." We almost always improve this using Post-Processed Kinematic (PPK) techniques to get down to centimetre-level accuracy.
- Point Cloud Georeferencing: Using that refined trajectory, the software then takes the laser scan data and assigns real-world X, Y, and Z coordinates to every single point the drone captured. What you get at the end of this step is a raw, unclassified point cloud.
- Data Classification: This is a huge step. Automated algorithms go through the point cloud and classify points into different categories, figuring out what’s ground, what’s vegetation, what’s a building, and so on. This is how you separate the actual terrain from all the objects sitting on it.
- Creating Final Products: Once your point cloud is nicely classified, you can start generating the valuable final products your project needs. This could be a Digital Elevation Model (DEM) showing just the bare earth, a Digital Surface Model (DSM) that includes all the trees and buildings, or even detailed 3D models of specific assets.
Drone LiDAR Applications in Australian Industries
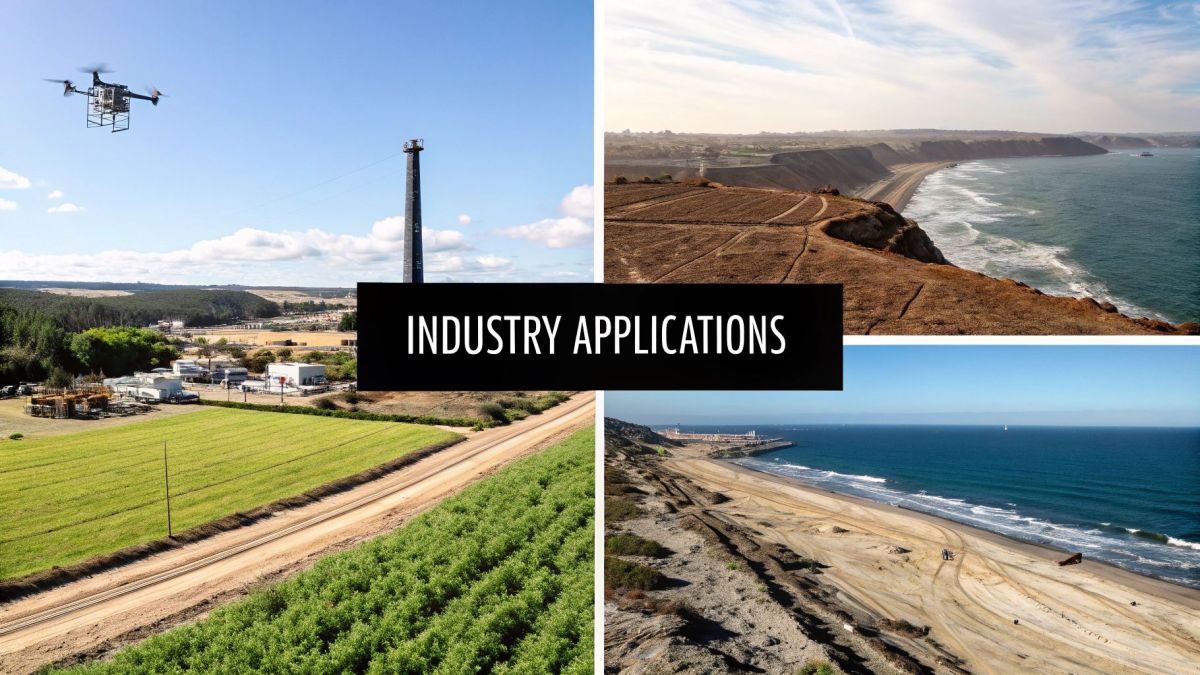
The real power of putting LiDAR on a drone becomes clear when you see it solving complex, real-world problems. Across Australia, this technology is moving beyond theory and delivering real value, making operations safer, more efficient, and far more data-rich.
From the red earth of the Pilbara to the dense forests of Tasmania, industries are finding new ways to measure and manage their environments with incredible detail. Each application tells a story of better decision-making, driven by the accurate 3D data only drone LiDAR can provide.
The growth in this space is massive. Australia’s drone market recently pulled in revenue of over USD 1 billion, with hardware like LiDAR sensors being a key part of that. Projections show this market growing at a CAGR of 17% through 2030, set to reach roughly USD 2.7 billion. This boom shows just how much sectors like mining and construction—both cornerstones of the Aussie economy—are leaning on precision geospatial data. You can get the full picture by checking out Australia's drone market trends.
Mining and Resource Management
In mining, accuracy means profit and safety. For years, measuring the volume of stockpiles was a slow, clunky, and often dangerous job for surveyors on foot.
Now, a LiDAR on a drone can fly over these enormous piles of ore or coal and capture millions of data points in minutes. This info is then used to calculate volumes with an accuracy that old-school methods just can't touch, leading to tighter inventory management and sharper financial forecasting.
It's not just about stockpiles, either. These drones are essential for:
- Pit and Tailing Dam Surveys: Keeping an eye on structural integrity and changes over time to ensure the site is safe.
- Haul Road Optimisation: Mapping road surfaces to spot problems that could cause expensive wear and tear on heavy machinery.
- Exploration Mapping: Creating detailed topographic maps of potential new mining sites, even when they're covered in thick scrub.
This isn't just about going faster; it's about getting people out of harm's way. A drone can map an unstable pit wall or a busy operational area without putting a single person at risk. That's a huge leap forward for workplace health and safety.
Environmental and Coastal Monitoring
Australia's unique and fragile ecosystems need careful management, and drone LiDAR has become an essential tool for conservationists and land managers. Because it can see through vegetation, it's perfect for understanding what's actually happening on the ground.
Take bushfire recovery, for instance. A LiDAR-equipped drone can fly over a burn scar and accurately map the extent of the damage and assess the "burn severity" on the forest floor. This data is gold for planning effective regeneration and erosion control.
Other key environmental uses include:
- Coastal Erosion Mapping: Precisely tracking how dunes and shorelines are changing to model the impacts of sea-level rise.
- Forestry and Carbon Audits: Measuring tree height, canopy density, and biomass to calculate carbon stocks with high accuracy.
- Waterway Analysis: Mapping riverbanks and floodplains to build detailed models for flood risk assessment.
Infrastructure and Construction
On a modern construction site, keeping track of progress is everything. Drone LiDAR delivers a "digital twin" of the site, letting project managers compare what's been built with the original design plans.
This helps catch mistakes early, before they turn into costly rework. It also provides a clear, objective record of progress for stakeholder updates. A quick flight can verify earthwork volumes, check that foundations are in the right spot, and make sure the site is graded correctly—all with centimetre-level accuracy. It’s no wonder drone LiDAR has become a go-to tool for keeping complex projects on time and on budget.
Ensuring Your LiDAR Data Is Accurate and Reliable
Capturing millions of points from the sky is one thing, but if that data isn’t accurate, it’s not much more than a pretty picture. The final, and arguably most critical, step is making sure your LiDAR data is reliable enough to be trusted. This is where quality control turns a raw point cloud into a dependable source of truth for your project.
To get there, you first need to understand the two sides of accuracy. I like to think of it like building flat-pack furniture.
-
Relative Accuracy: This is all about how well the individual pieces of your point cloud fit together. Are the walls straight? Do the corners meet at a perfect 90 degrees? It's the measure of your model's internal consistency.
-
Absolute Accuracy: This is about how well your assembled furniture fits in the actual room. It measures how closely your digital model lines up with its true position on Earth.
For almost any professional job in engineering, construction, or surveying, high absolute accuracy is what you’re chasing. You need complete confidence that a specific point in your digital model corresponds to that exact same point on the ground, often down to the centimetre. This is where quality assurance comes into play.
The Role of Ground Control Points
The gold standard for verifying and improving absolute accuracy is using Ground Control Points (GCPs). These are just clearly marked targets you place on the ground before the flight, but their coordinates have been precisely measured by a surveyor using high-grade GPS gear.
Back in the office, you match these known ground points to the corresponding points in your drone's data. This simple step anchors your entire dataset to the real world, correcting any tiny drifts or errors from the flight. Even with fantastic RTK and PPK systems reducing the need for lots of GCPs, using a few as independent check-points is still a non-negotiable best practice.
Think of GCPs as your quality control checklist. They’re an independent, trustworthy measurement that proves your drone's data isn’t just internally consistent, but geographically correct. It’s the final stamp of approval on your work.
Factors That Influence Data Accuracy
Getting highly accurate data is no accident. It’s the result of carefully managing a few key variables from start to finish. If any single part of the process is weak, it can throw off the quality of your final model.
Here’s what to watch out for:
-
GNSS Signal Quality: A strong, stable connection to plenty of satellites is the foundation of good positioning. Flying in deep "urban canyons" or under dense tree canopies can block this signal and introduce errors.
-
IMU Calibration: As we talked about earlier, a proper IMU initialisation before you even take off is crucial. A poorly calibrated IMU will incorrectly record the drone’s orientation, which can warp or tilt the entire point cloud.
-
Sensor Calibration: The LiDAR sensor itself needs to be properly calibrated so its internal laser and angle measurements are spot-on. This is usually handled by the manufacturer, but it’s something you should have checked periodically.
A huge part of delivering a trustworthy final product is knowing how to clean point cloud data for accurate models by removing noise and refining the details. This post-processing cleanup is just as important as the flight itself. By managing these factors and using GCPs to verify your results, you can be sure your lidar on a drone produces data that’s not just detailed, but genuinely accurate.
Flying by the Rules: Safe and Legal Drone Operations
When you’re flying a piece of high-tech gear like a LiDAR drone, the technology itself is only half the story. The other half is about being a safe, professional, and law-abiding operator. Here in Australia, the skies are managed by the Civil Aviation Safety Authority (CASA), and they set the rules for all commercial drone work to keep everyone safe, both on the ground and in the air.
Getting a lidar on a drone airborne and working for your business isn’t just about ticking off a few legal boxes. It’s about creating a deep-seated culture of safety. This mindset protects your crew, your expensive equipment, and the public. For any serious commercial operation, these regulatory steps aren't optional—they're the foundation of your business.
Your Core Responsibilities
Before your drone’s wheels ever leave the ground for a commercial job, CASA has a few requirements you need to meet. Think of these as the absolute essentials for proving you have the skills and accountability to fly safely.
- Operator Certification (RePL): First up is getting your Remote Pilot Licence (RePL). This is your ticket to fly, proving you’ve got the theory down and the hands-on skills to operate a drone for commercial purposes.
- Drone Registration: Every drone used for business in Australia has to be on CASA’s books. It’s just like registering a car—it links the aircraft to you, the responsible owner.
- Standard Operating Procedures (SOPs): You need a written game plan. Your SOPs are the manual for your operations, detailing everything from pre-flight checklists to what to do in an emergency. It ensures every flight is as safe and consistent as the last.
Best Practices for LiDAR Drone Missions
LiDAR missions bring their own set of challenges. You're often dealing with heavier, more valuable drones, and flights might be near critical infrastructure like power lines or busy roads. This definitely raises the stakes.
Being proactive about safety is everything. Before each flight, a thorough risk assessment is a must. You need to identify every potential hazard specific to that site and mission—think weather, airspace restrictions, and any risks on the ground.
Data privacy is another big one. Your LiDAR drone is collecting incredibly detailed information, so you have to be conscious of people's privacy, especially when flying over private land. Concepts like geofencing in fleet management can offer useful parallels for how to maintain strict operational control, which is key for both safety and compliance.
There's no doubt this technology is taking off. The global LiDAR drone market was valued at USD 210.4 million and is tipped to hit around USD 699.9 million by 2033. Industries like construction and agriculture are big drivers of that growth right here in Australia. As more drones take to the sky, a professional, safety-first attitude is what will set successful operators apart. You can read more about the growing LiDAR drone market on imarcgroup.com.
Common Questions About Drone LiDAR
As you start digging into the world of drone LiDAR, you'll naturally have a few questions. People often want to know how it stacks up against other mapping methods and what it really costs to get started.
Let's clear up some of the most common queries we hear from professionals looking to adopt this technology.
How Is LiDAR Different From Photogrammetry?
This is probably the number one question we get asked. The simplest way to frame it is by thinking about 'active' versus 'passive' sensors.
LiDAR is an active system. It generates its own light, firing out thousands of laser pulses every second and measuring their return. This is its superpower—it lets you survey at night and, crucially, allows laser points to punch through dense vegetation to map the true ground beneath.
Photogrammetry, on the other hand, is a passive system. It’s essentially a very sophisticated camera that relies on ambient light (usually the sun) to capture images. Software then stitches these images together to create a 3D model. It’s brilliant for generating visually rich, full-colour models, but it struggles to see through tree canopies and is limited by weather and light conditions.
What Does a Professional Drone LiDAR System Cost?
The price tag on a professional LiDAR system can vary quite a bit, and it really comes down to the performance and accuracy you need for your work.
You can find solid, entry-level professional systems—which typically include the LiDAR sensor and the integrated navigation components—starting from around AUD $25,000 to $50,000. These are excellent for a wide range of applications.
If you're chasing survey-grade results with the best possible accuracy, range, and point density, you’ll be looking at high-end systems that can easily exceed AUD $150,000. Keep in mind, this price is usually for the LiDAR payload itself, not the drone.
It's best to think of this as an investment in data quality. A higher-end system might cost more upfront, but it often produces much cleaner data that saves significant time and money on post-processing.
How Long Does It Take to Process LiDAR Data?
Processing time really depends on two things: the scale of your project and the density of the point cloud you’ve captured.
For a small survey—say, a few hectares—you could be looking at a couple of hours of processing on a decent computer. But for a large-scale, complex project mapping several square kilometres with extremely dense data, it could easily take a full day or more to get from raw data to a final, classified point cloud.
At Innoflight International, we specialise in high-precision LiDAR drone solutions built for demanding Australian conditions. If you're ready to see how this technology can transform your operations, explore our advanced UAS platforms at https://evolutionflight.com.